
Quickstart
This quickstart walks the smallest end-to-end flow in C21 Live Control starting from a fresh install. You will create the three core resources — Channel, Encoding and Destination — bind them on a Live stream, start it with the publishing matrix, monitor it on On air and stop it. To keep the path short: one Channel, one Encoding, one Destination.
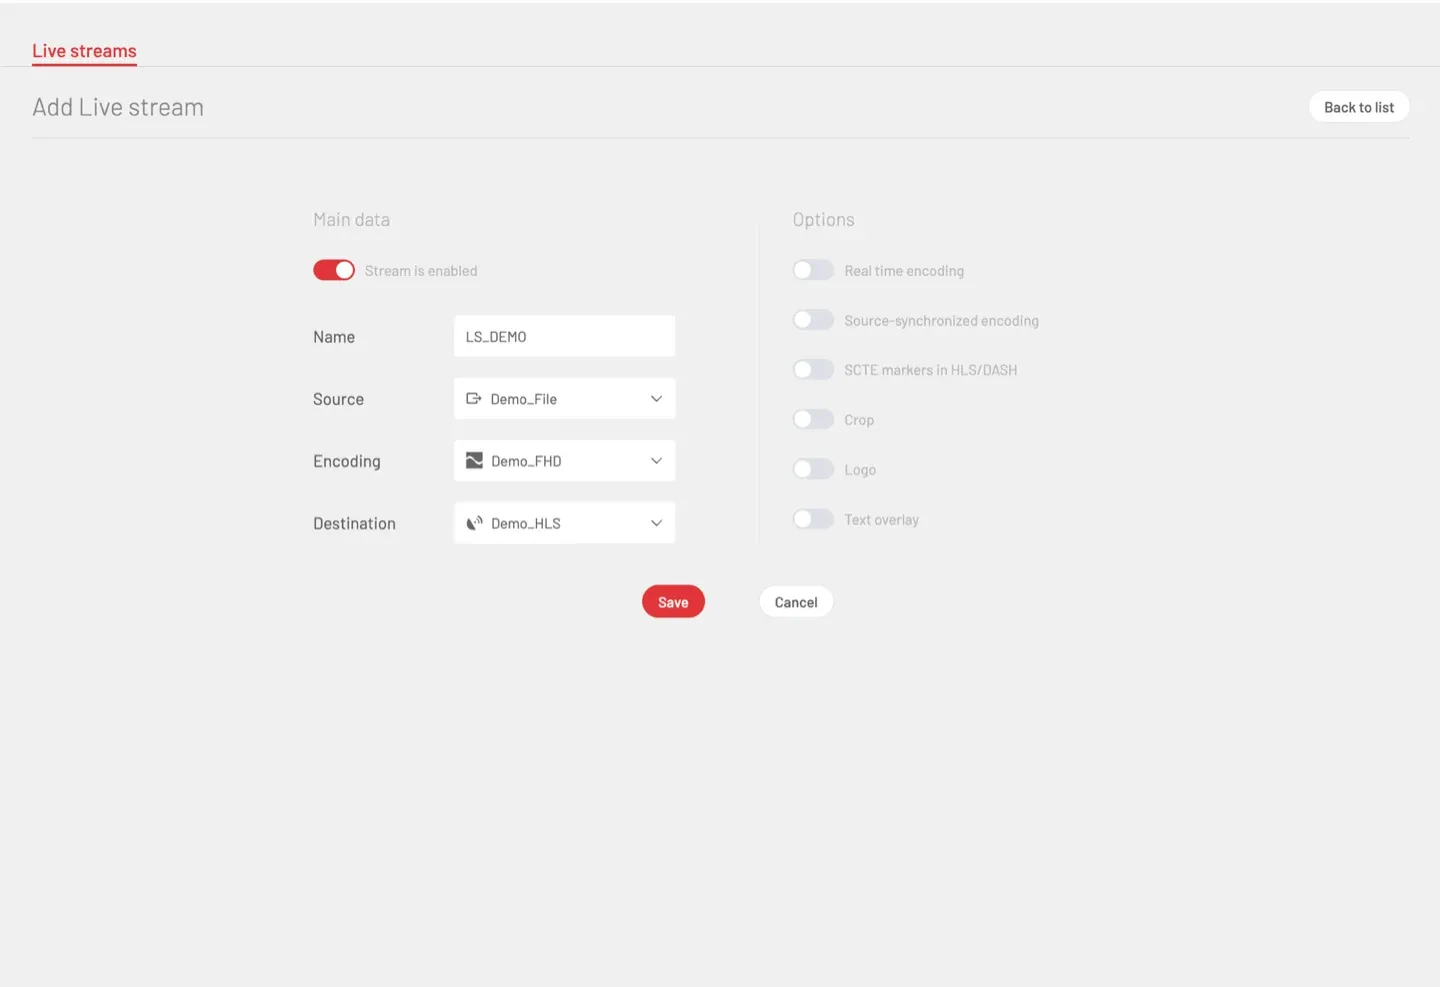
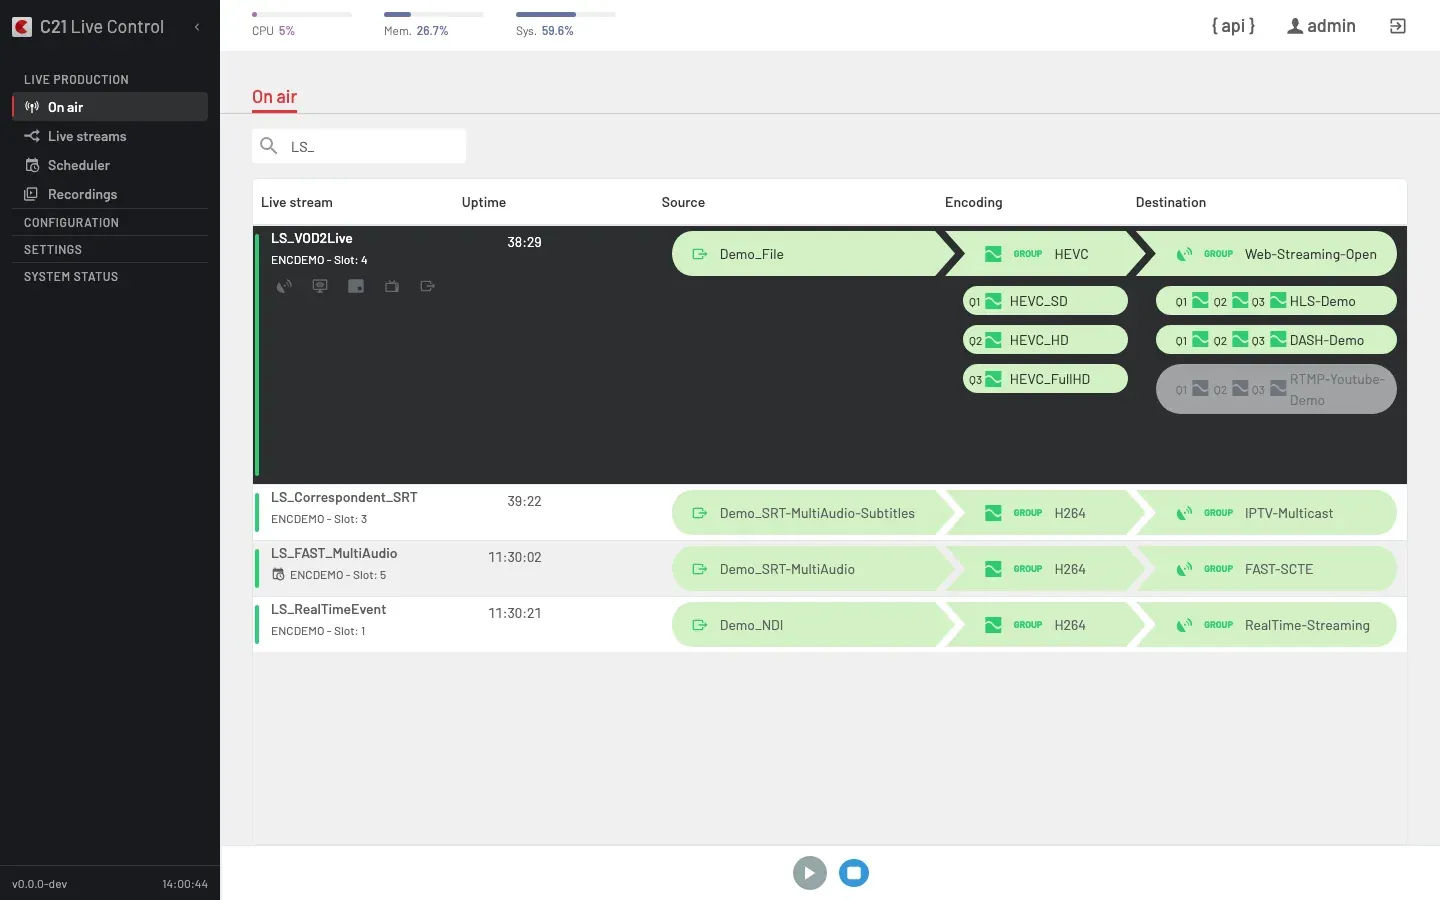
The baseline configuration used by this guide is the one in the screenshot above: Source: Demo_File · Encoding: Demo_FHD · Destination: Demo_HLS · Name: LS_DEMO. Any equivalent combination works — the flow is the same.
How it works
1. Sign in
Open the Live Control URL in a browser (https://<host>:9443) and sign in with a System Administrator account — creating the Channel, the Encoding and the Destination requires that role. The On air view loads as the default page when no broadcasts are running yet.
2. Create an input Channel
Open Sources in the left rail and click Add source.
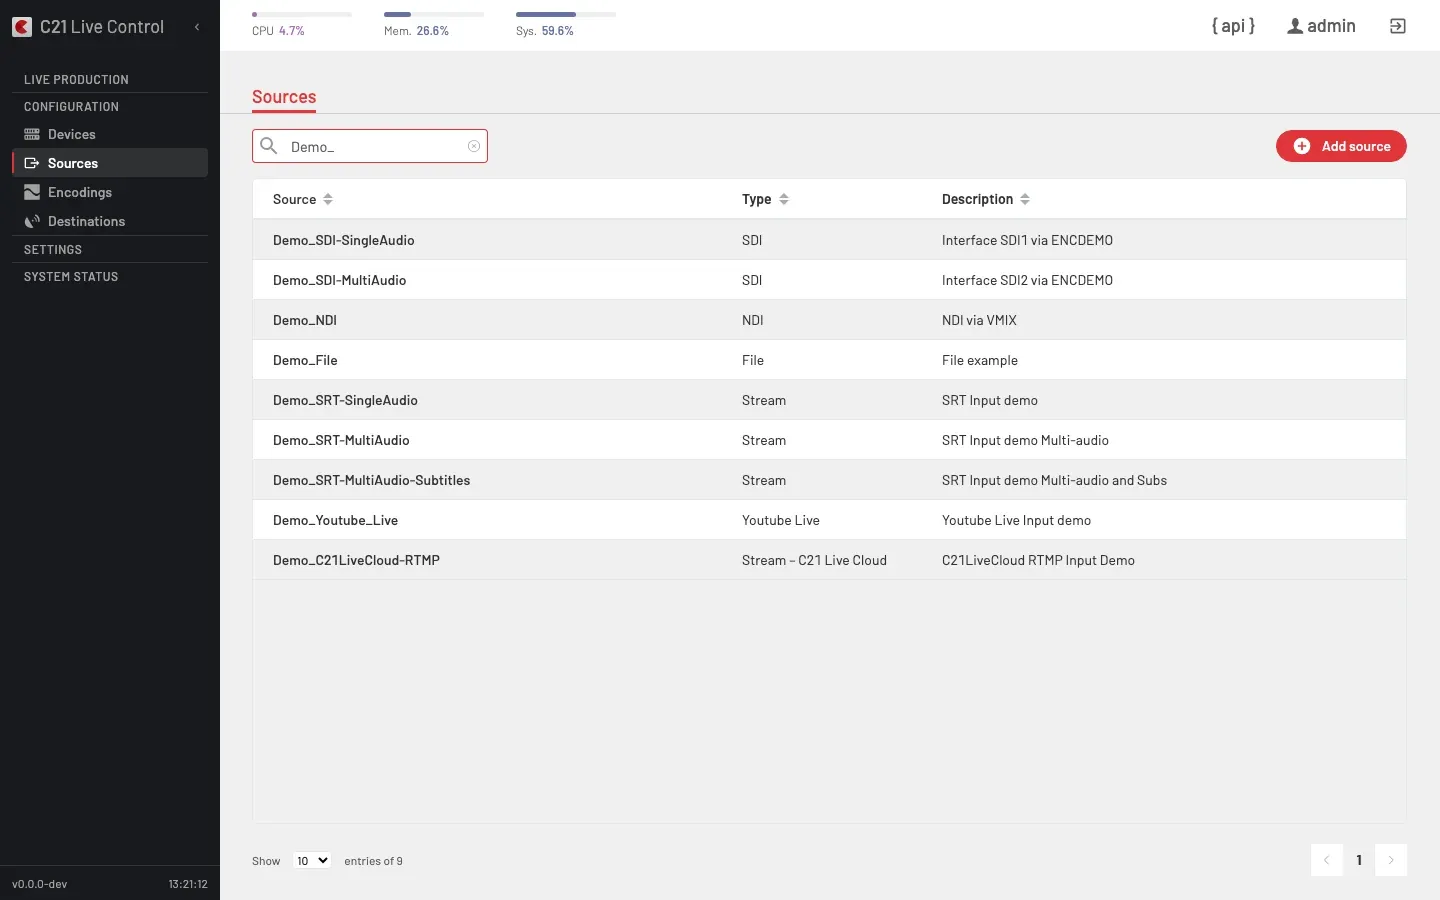
Pick the Channel type — the choice drives the rest of the form:
| Type | When to use it |
|---|---|
| File | A media file replayed continuously as a live signal. The simplest option for a first run. |
| SDI · AES/EBU | Baseband input on a studio encoder. |
| NDI | An NDI stream advertised on the local network. |
| SRT | Field contribution, caller or listener, with optional encryption. |
| Stream | IP pull (HLS / RTMP / HTTP / RTP / UDP multicast). |
| Stream – C21 Live Cloud | Push contribution into C21 Live Cloud (RTMP, SRT or UDP-R transport). |
| Youtube Live | Ingest from a publicly-visible YouTube Live broadcast. Requires the C21LiveYouTube licence. |
For this guide a Channel of type File (for example Demo_File) pointing at a looped test file is enough. Save — the Channel surfaces in the catalogue. The full reference lives under Sources.
3. Create one or more Encodings
Open Encodings and click Add encoding.
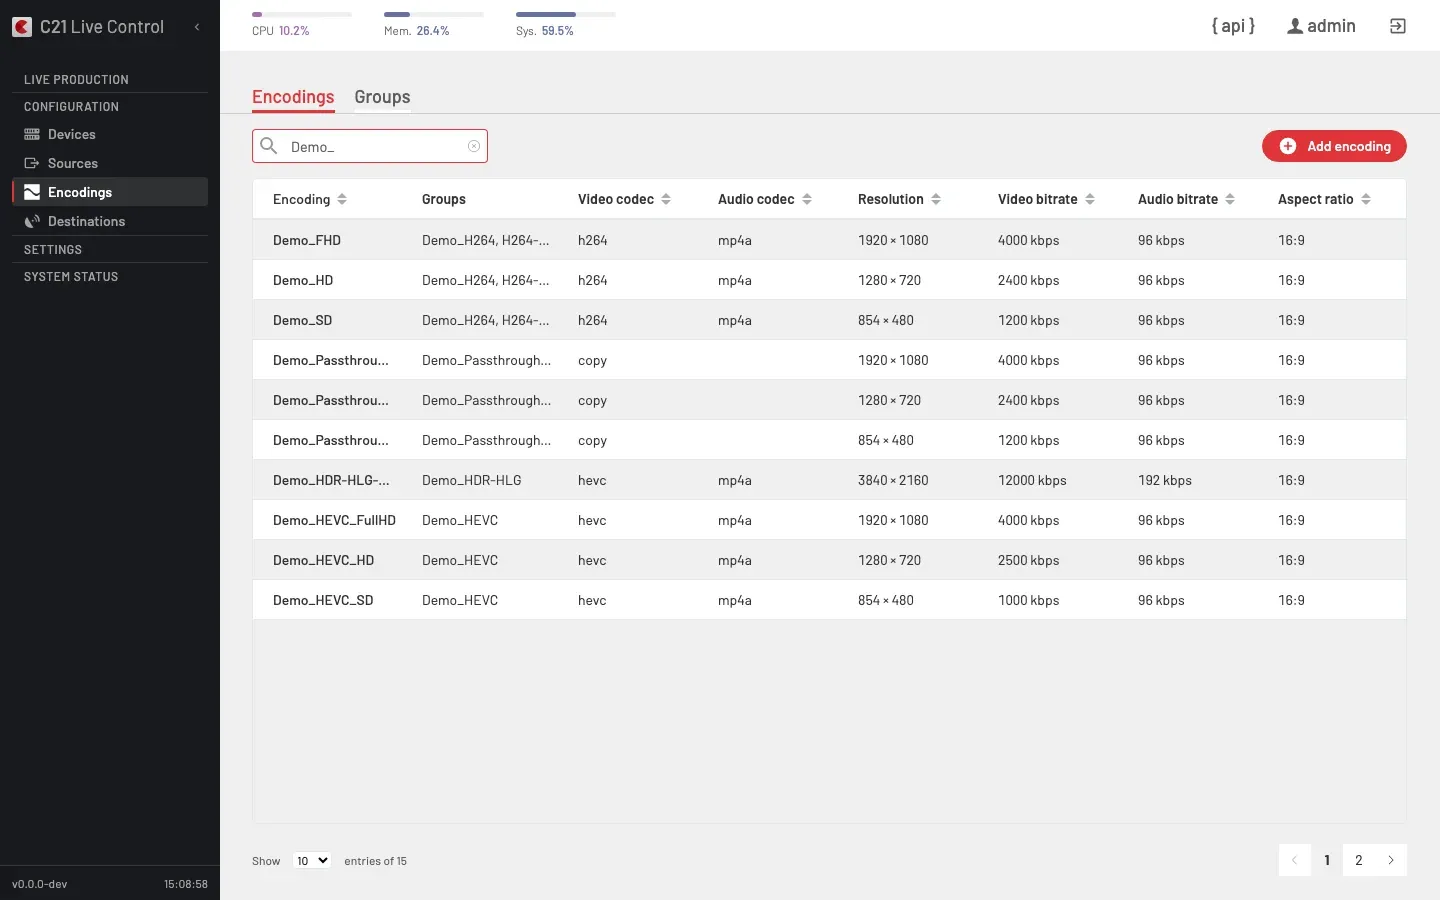
An Encoding is an encoding recipe: video codec + bitrate + resolution + frame rate + audio codec + HDR settings. For this guide one Encoding is enough (for example Demo_FHD — H.264, 1920×1080, ~5 Mbps). The full field reference lives under Encodings.
Encoding group (optional — for multi-bitrate delivery)
If you want to deliver an ABR ladder (several renditions of the same broadcast at different bitrates) create an Encoding group from the Groups tab in the same section.
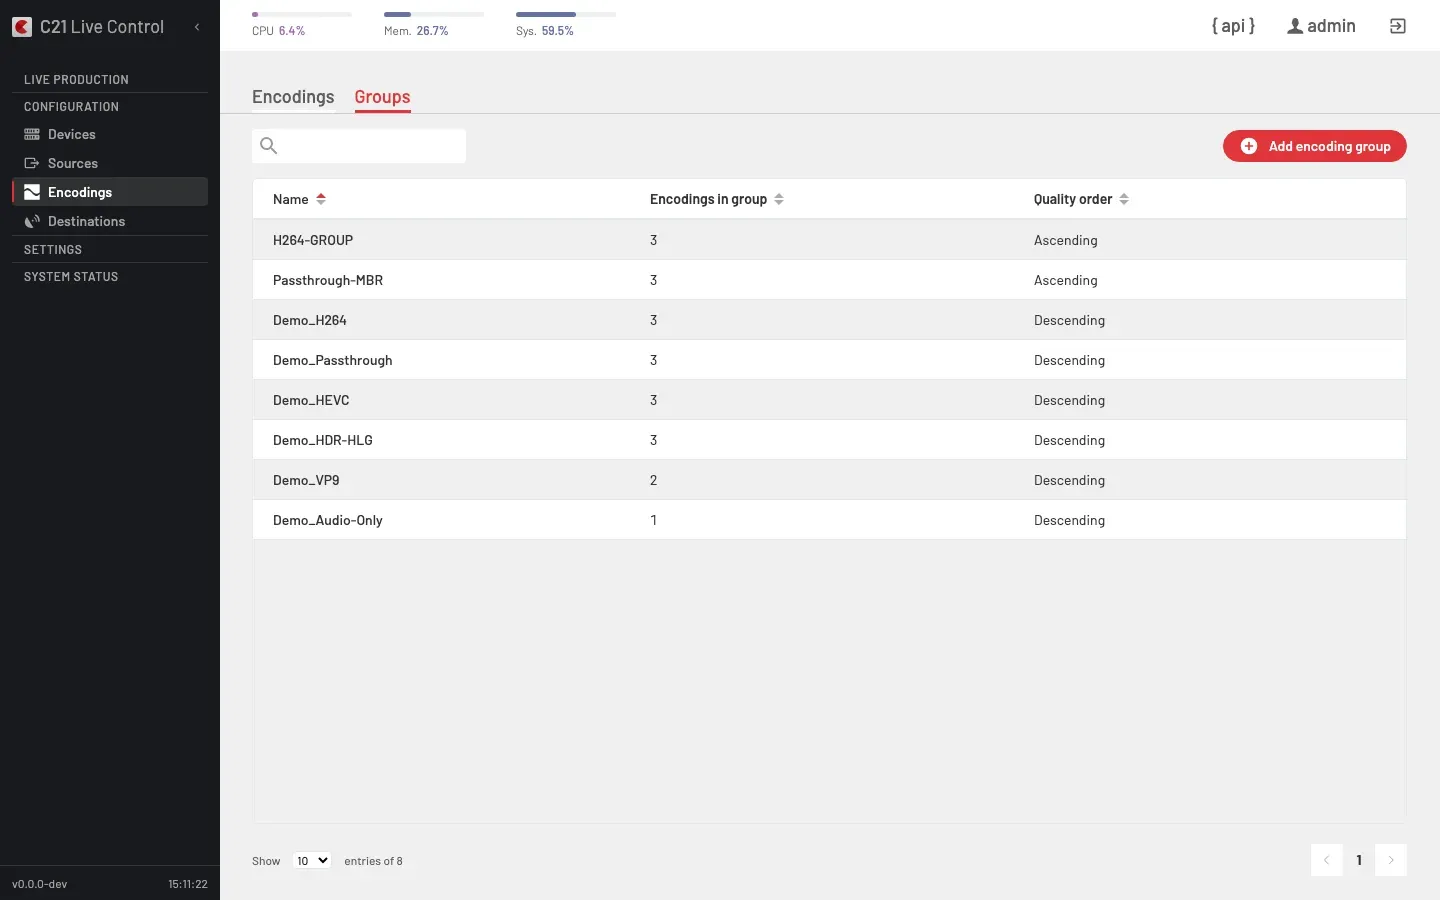
A group is an ordered set of Encodings the Live stream produces in parallel. For this first run you can skip it and bind a single Encoding directly to the Live stream.
4. Create a Destination
Open Destinations and click Add destination.
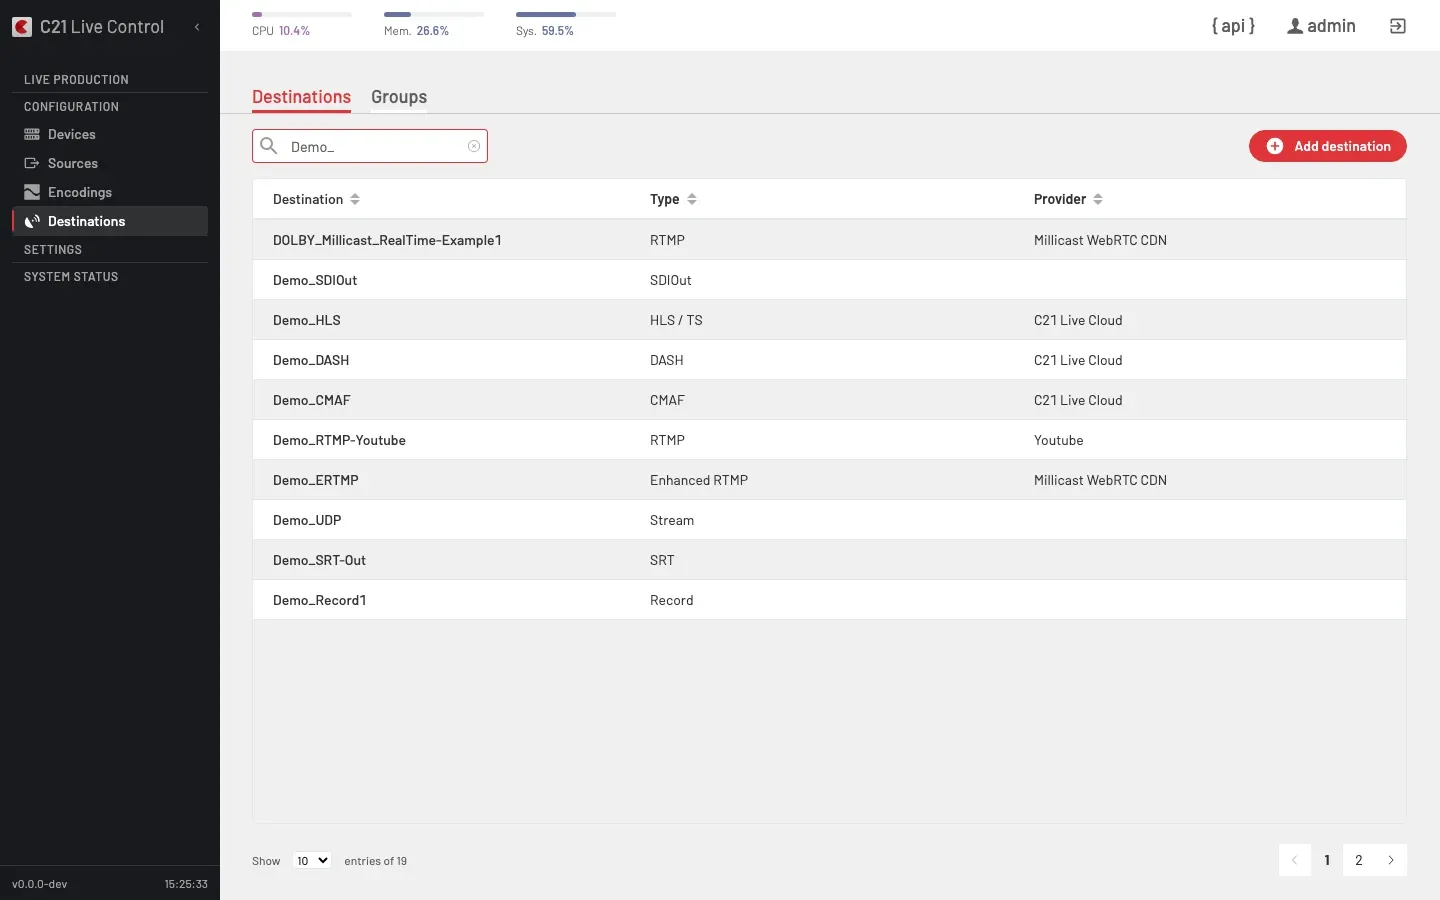
Pick the Destination type. Supported types are HLS / TS, DASH, CMAF, RTMP, Enhanced RTMP, SRT, STREAM (UDP / MPEG-TS), SDIOUT and Record. The rest of the form depends on the chosen type.
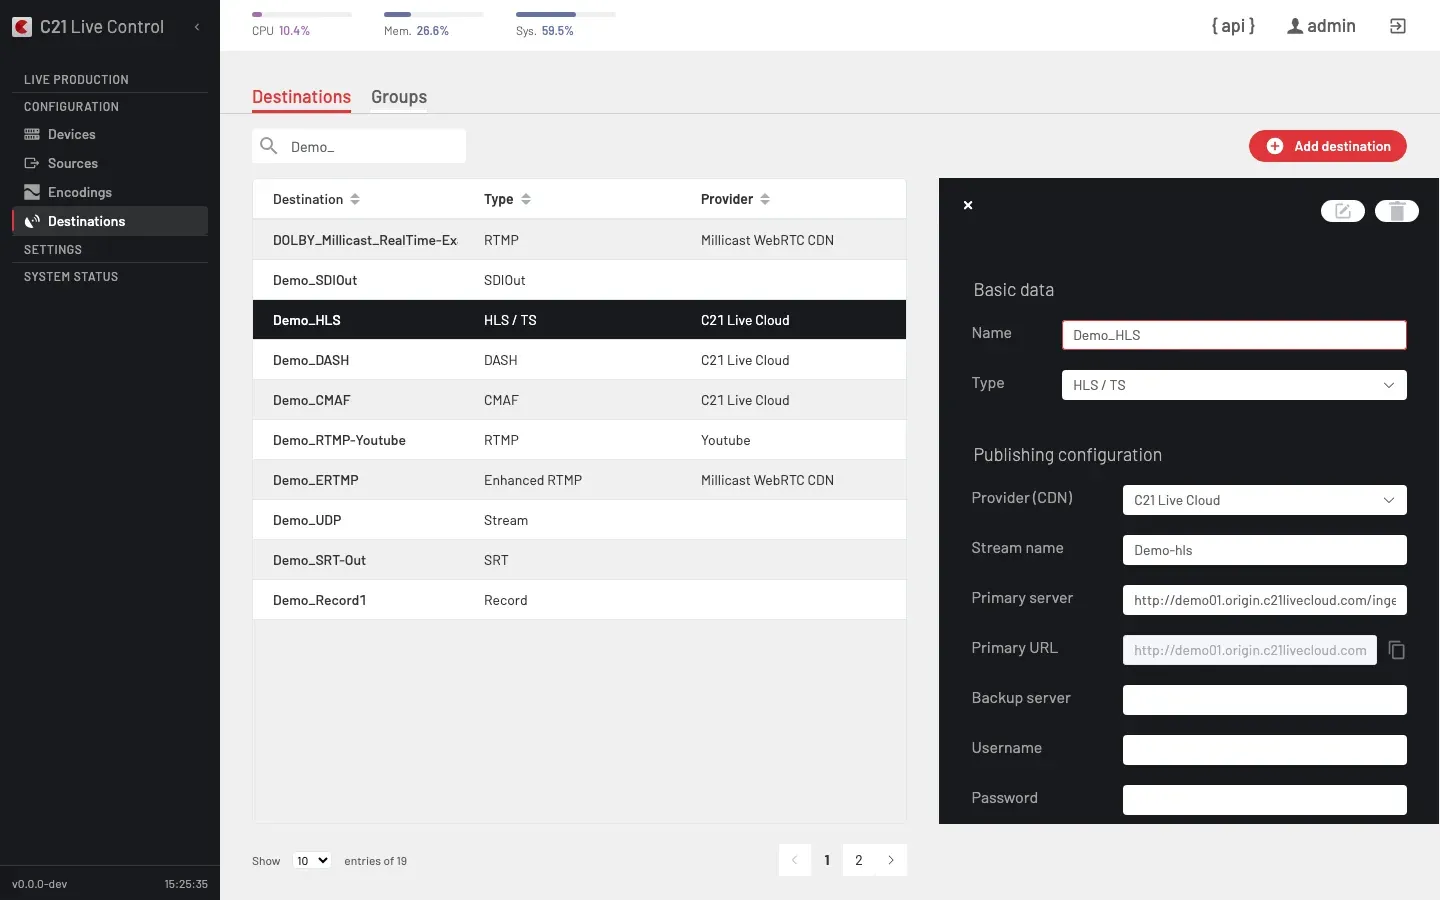
For this guide an HLS / TS Destination (for example Demo_HLS) targeting your CDN or a local origin is the fastest path — just the ingest URL and the stream name. Save. The full reference lives under Destinations.
Destination group (optional — for emitting to several destinations in parallel)
If you want the same broadcast to publish to multiple destinations at once (for example HLS to the CDN + RTMP to YouTube + a local recording), bundle them into a Destination group from the Groups tab.
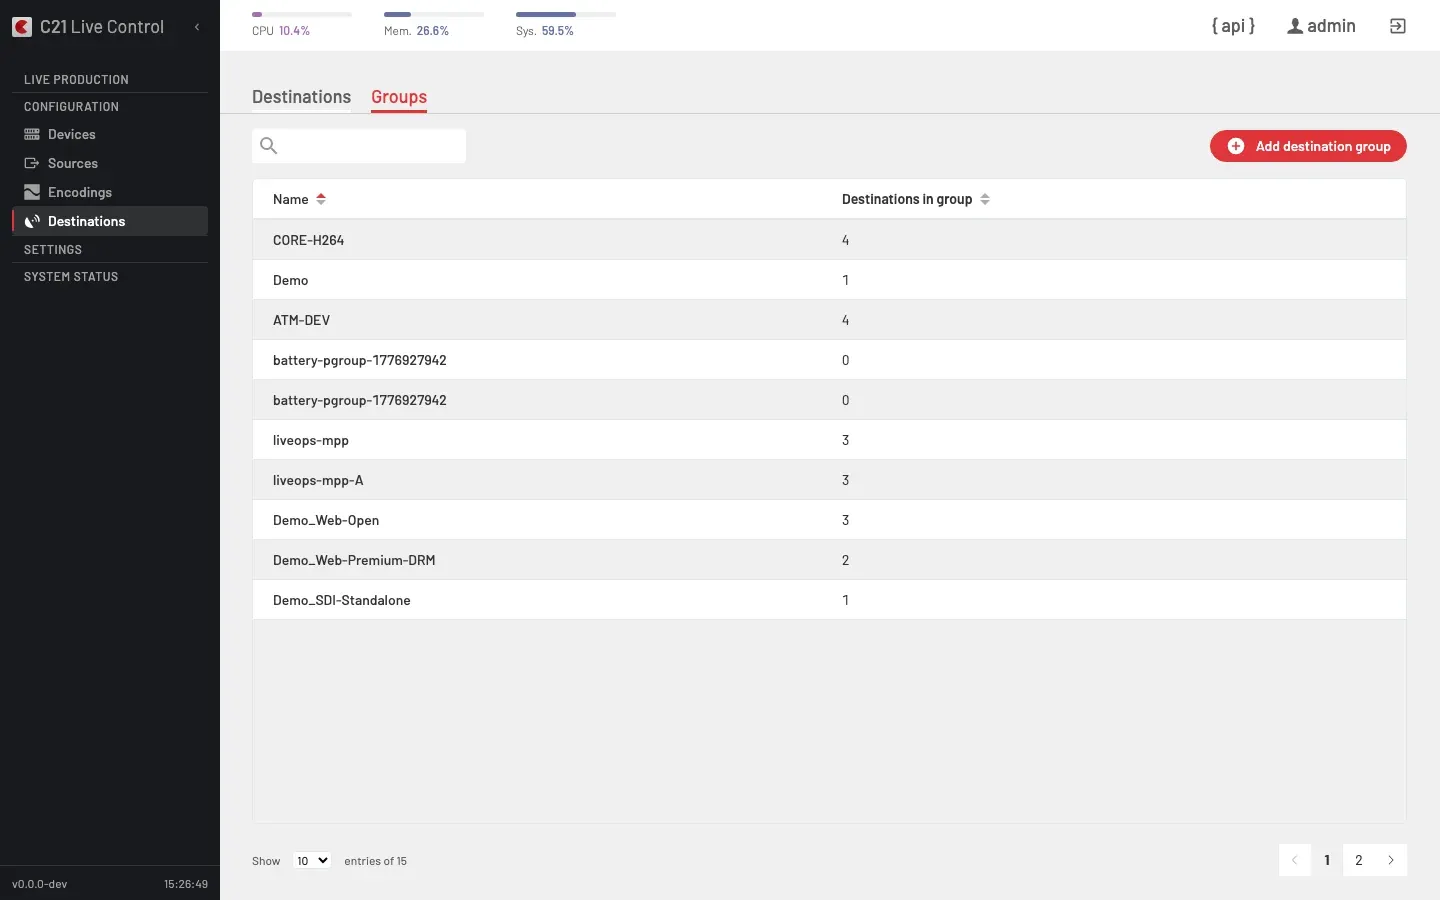
For a first run you can skip this step and bind a single Destination directly to the Live stream.
5. Create the Live stream
Open Live streams and click Add Live stream. Fill in the editor with the resources you just created:
| Field | Value |
|---|---|
| Stream is enabled | ON (leave it active so the stream can be started). |
| Name | Display name reused across the UI, API and logs (for example LS_DEMO). |
| Source | The Channel from step 2. |
| Encoding | The Encoding from step 3 (or the Encoding group, if you created one). |
| Destination | The Destination from step 4 (or the Destination group, if you created one). |
The Options column on the right (Real time encoding, Source-synchronized encoding, SCTE markers in HLS/DASH, Crop, Logo, Text overlay) are advanced toggles — leave them off for this first run. Click Save.
The new Live stream appears in the Live streams list with a coloured status strip (grey / red for stopped, green for on air).
6. Start the Live stream — publishing matrix
From the Live streams list, trigger the Start action in the footer (On air only stops running broadcasts; the start action always lives on the list or the detail page).
The start-with-options dialog asks for:
- Encoder / Encoder group — the Device (or pool of Devices) that will run the broadcast. A single Device with free capacity is enough for a minimal setup.
- Destination matrix — which Destinations of the bound Destination group are activated on this start, and which path (primary / backup) each one uses. When you bound a single Destination in step 4, the matrix has a single row — leave it on.
Confirm. The Live stream's status strip turns green, the Uptime counter starts ticking and the row surfaces in the On air view. While on air, the Live stream editor is locked with the alert "Live stream is running. Stop it to make changes."
7. Monitor it on On air
Open On air from the left rail.
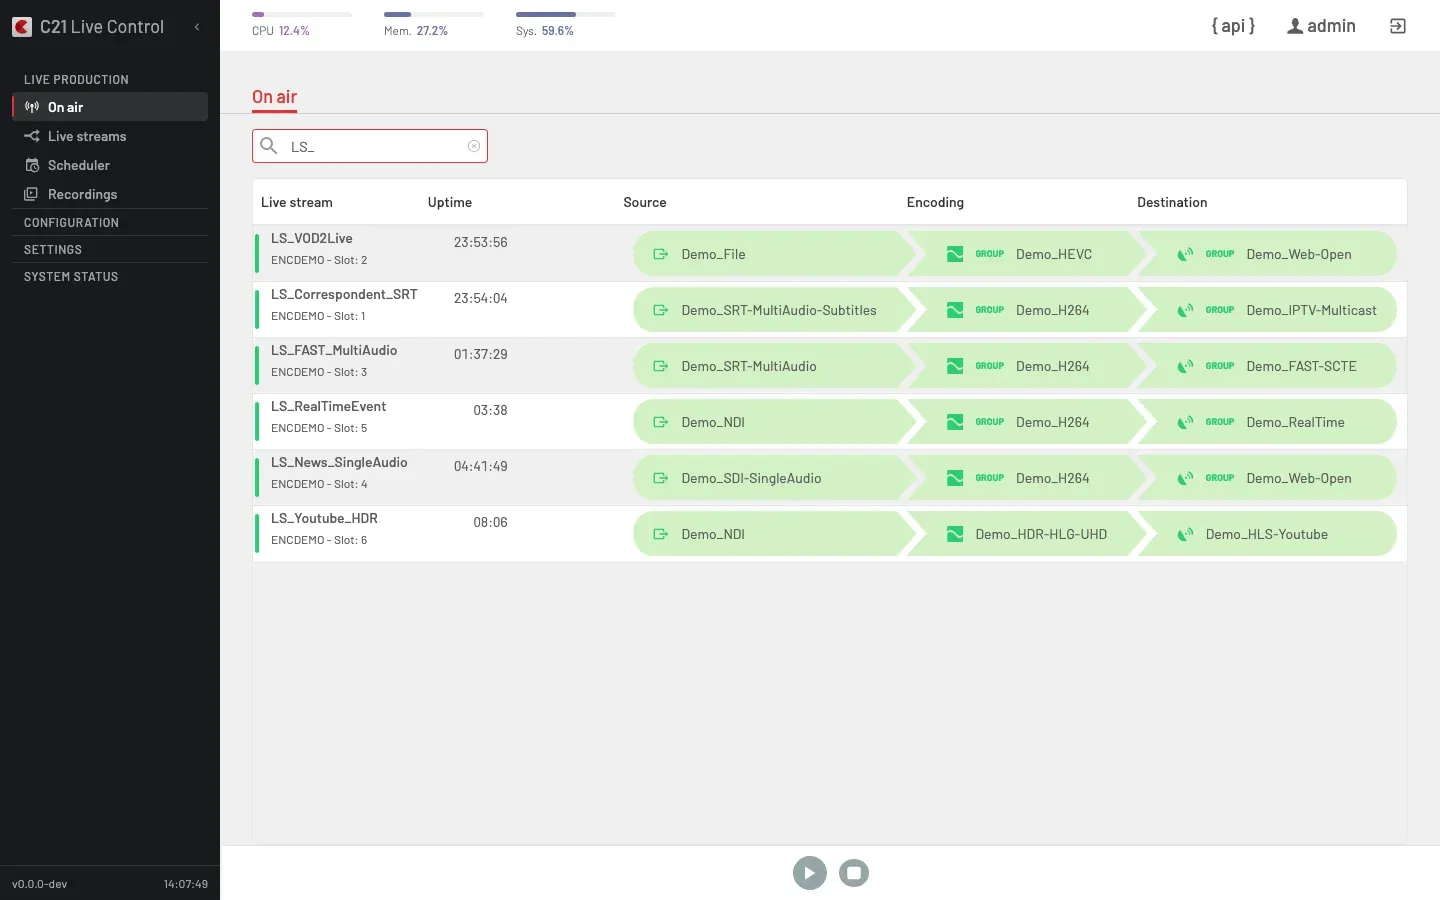
The row for the Live stream you just started shows:
- Status indicator — coloured vertical strip on the left edge. Green = on air.
- Live stream — name + encoder/slot.
- Uptime — time since the encoder reported the broadcast as active.
- Source / Encoding / Destination — entrypoints with a per-entrypoint health indicator.
Click the row to expand the runtime panel — from there you can toggle Destinations, apply a logo, blackout the output, switch the source or push metadata without taking the broadcast off the air. The full runtime-ops reference lives under On air.
8. Stop the Live stream
From the On air row (or from the Live streams list), trigger the Stop action and confirm the "Do you want to stop this Live stream?" dialog. The status strip returns to grey/red, the row leaves the On air list and the Live stream editor unlocks.
Next steps
- Concepts — the domain glossary: Channel, Encoding, Destination, Live stream and the rest of the entities you just touched.
- Streaming → Live streams — full reference for the list, the detail panel, the Device-group binding and the lifecycle.
- Streaming → Scheduler — move from ad-hoc start/stop to recurring scheduled broadcasts.
- Streaming → Sources / Encodings / Destinations — per-resource reference for the fields you just filled in.
- Integrations → API — drive the same flow from
curlinstead of the UI.